Now making dresses for other people presents its own challenges but making dresses for other people who live two hours away is a whole other kettle of fish. So after going back and forth on email and checking out pattern reviews we settled on two patterns. The first is the Simplicity 4940 and the second is a McCall's that I will post separately. (It was that bad!)
Dress number 1
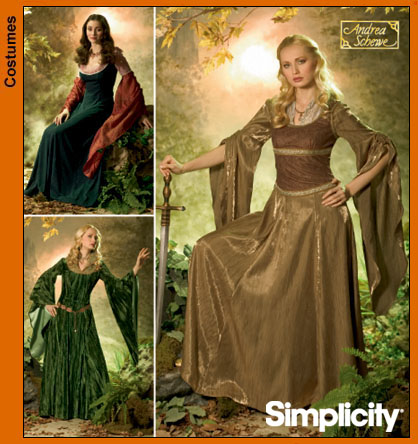
She selected view B, which is the beige outfit in the picture. We did the dress in a dark navy and the bodice in a baby blue. Both were a polyester blend satin.
Modifications:
I needed to make a few adjustments. I am sure glad I took that pattern fitting class at Ultimate Sewing. I sure needed it for both dresses.
Shoulders:
I took out 1" in shoulder width.
Bodice:
I tapered the pattern from a 14 to a 12 at bust, back to a 14 at waist and flared out to a 16 at hips. I also took 1.5" out of the bodice length. I did this to the bodice of the dress and the bodice overlay. I was a little worried about these adjustments because at the time this was the most adjustments I had ever done to a pattern.
Arms:
I didn't adjust the pattern pieces for the arms but when I did assemble the lower sleeve portion I made the seam allowances 3/4" which I will explain later.
Hem:
I changed the hem to 1 1/2" from the 5/8" on the pattern to accommodate the finished length required and to give the finished hem a nicer finish.
Construction:
This dress actually went together very well. The instructions were very clear and the assembly was very straight forward. The hem at the neck line in the organza was a little tricky to get it to look nice when making the transition from front yoke to back yoke but I think that was an operator issue not a pattern issue.
The one construction change I made was to the channels for the trim on the lower sleeve. The instructions have you sew the seam with a 5/8" seam allowance. You then press open the seam and stitch down each side of the seam 1/8" from the raw edge to form the channel. First this doesn't look nice and secondly this fabric frays too much for that to work. I ended up sewing a 3/4" seam allowance which left enough to fold under the raw edge a 1/4" to get a much nicer look and still have lots of room for the 1/8" cording. It looked much nicer. The sleeve bottom also fitted the upper sleeve much nicer with the removal of the extra and prevented easing being necessary.
Comments:
Holy wow there is a lot of fabric. I didn't think I would ever get around that hem! Not a fault of the pattern or the dress just not used to sewing this much of an item. I was able to apply the trim to the bodice with the machine instead of sewing it on by hand which was a huge relief. I have seen the dress on now and it looks good if I do say so myself.

Sorry about the quality of the photo. There was NO way this tiny little dress was going to fit on my dress form!
No comments:
Post a Comment